
Mass Shipment
Mass Shipment Booking allows you to create and book multiple shipments at one time using Excel or CSV file uploads.
Open the Mass Shipment page from the left-side menu or directly at transportal.parcelinternational.com/massbooking/index.
To use this feature, your payment option must be configured as:
- Weekly Invoice
- Automatic Transaction
You can update your payment option from My Profile.
Step 1: Review the booking guidelines
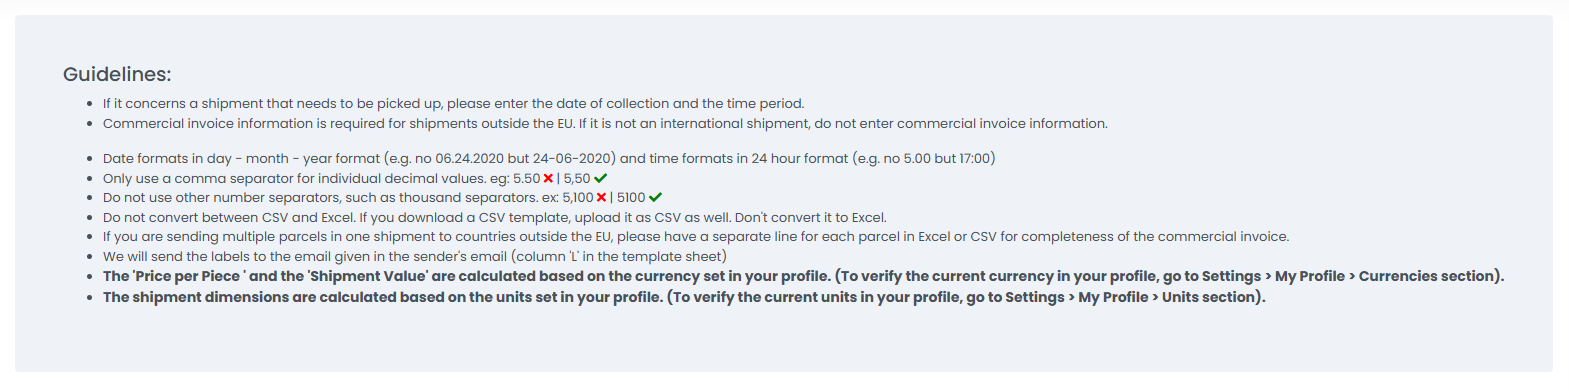
- The guidelines section displays important instructions and validation rules for mass shipment bookings.
- Review these guidelines carefully before uploading Excel or CSV shipment files.
- Ensure the uploaded file follows the correct template structure and formatting rules.
Step 2: Download the templates and example files
- Use the available files to understand the required upload format.
- Available files include:
- Demo Excel File
- Template Excel File
- Template CSV File
- The demo file provides example shipment data.
- The template files should be used for creating your shipment upload files.

Step 3: Add shipment sender details
- Enter the shipment sender details in the sender section of the template.
- Include:
- Name
- Company
- Address
- House number
- City
- State
- Country
- Zip code
- Contact details
- Ensure sender information is complete and accurate.

Step 4: Add shipment receiver details
- Enter the shipment receiver details in the destination section of the template.
- Include:
- Name
- Company
- Address
- House number
- City
- State
- Country
- Zip code
- Contact details
- Ensure receiver details match the delivery destination correctly.

Step 5: Add shipment package details
- Enter the shipment package details including:
- Package type
- Quantity
- Weight
- Length
- Width
- Height
- Shipment value
- Ensure package dimensions and weight values are accurate to avoid carrier corrections.

Step 6: Add additional shipment details
- Configure the additional shipment settings in the shipment details section.
Incoterms (DDU/DAP, DDP): Define who is responsible for customs duties, taxes, and import charges during shipment delivery.
- DDU/DAP - Receiver pays duties and taxes.
- DDP - Sender pays duties and taxes.
Transit Type (D2D/P2D/P2P/D2P): Select how the shipment will be collected and delivered.
- D2D (Door to Door) - Pickup from sender address and delivery to receiver address.
- P2D (Port to Door) - Drop off at service point and delivery to receiver address.
- P2P (Port to Port) - Drop off and collect from service points.
- D2P (Door to Port) - Pickup from sender address and collect from service point.
Date Pickup (DD-MM-YYYY): Enter the preferred shipment pickup date using the day-month-year format.
Timeslot Start (HH:MM): Enter the preferred pickup start time using the 24-hour time format.
Timeslot End (HH:MM): Enter the preferred pickup end time using the 24-hour time format.
Contact via email/sms: Select whether shipment notifications and updates should be sent to the customer via email or SMS.
Shipment Value: Enter the total declared shipment value based on the currency configured in your profile.
Shipment Description: Provide a short and accurate description of the shipment contents to help carriers and customs authorities identify the shipment correctly.
Reference: Enter an internal or customer reference number to help identify the shipment later.
Insurance (Yes / No): Select whether shipment insurance is required.
Product Type: Define the shipment product category such as Standard, Dangerous Goods, Age Required, or other supported shipment types.
Notify the receiver (Yes / No): Select whether shipment notifications and tracking updates should be sent to the receiver.

Step 7: Add commercial invoice information
- Add commercial invoice details for shipments outside the EU.
- Commercial invoice information is not required for shipments within the EU.
- Include:
- Shipment content description
- Quantity
- Item value
- HS code
- Country of origin
- Weight
- Ensure commercial information is accurate for customs clearance.

Step 8: Upload the shipment file
- Upload the completed Excel or CSV shipment file using the upload section.
- Ensure the file follows the provided template format before uploading.

Step 9: Review uploaded shipment details and load rates
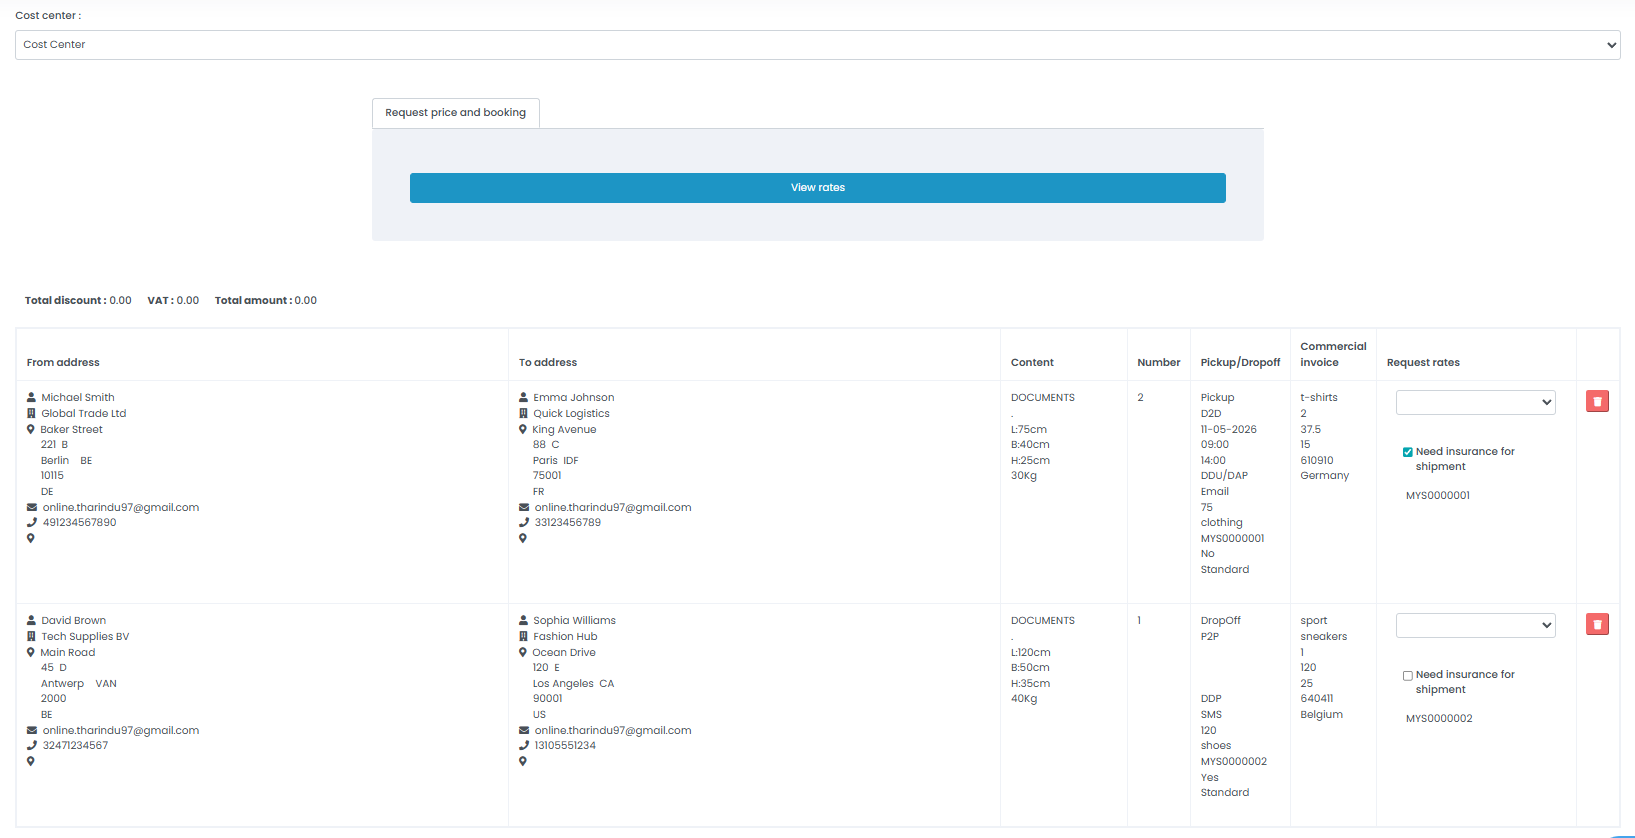
- After uploading the file, shipment details are displayed in the shipment table.
- Select the preferred costcenter from the CostCenter dropdown.
- Click the View Rates button to load available shipment rates.
- Available shipment rates are displayed in the Request Rates dropdown for each shipment in the table after click the View Rates button.
- Select the preferred shipment rate for each shipment.
Step 10: Select minimum rates or manually choose rates
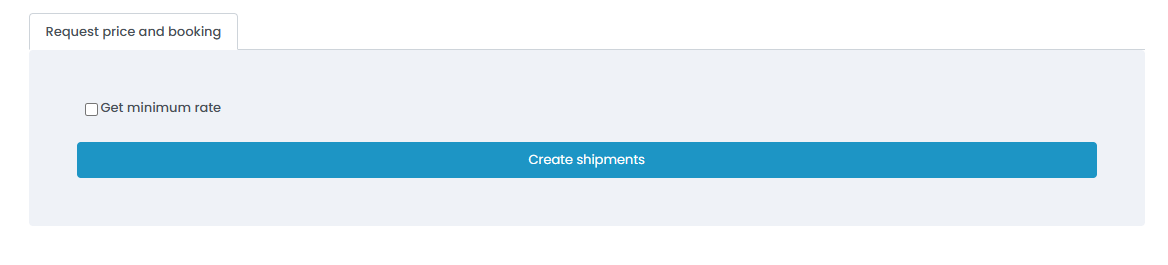
- If you want the system to automatically select the lowest available shipment rate for all shipments, enable the Get minimum rate checkbox.
- Alternatively, manually select a preferred shipment rate for each shipment from the available dropdown.
Step 11: Manage shipment insurance and remove shipments
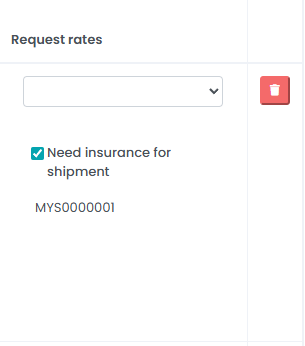
- Use the Need insurance for shipment checkbox to enable or disable shipment insurance.
- Remove unwanted shipments from the uploaded table using the Trash icon.
Step 12: Configure label generation options
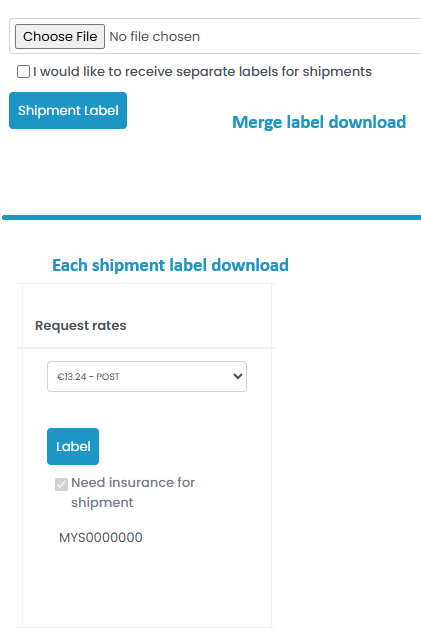
- Select whether shipment labels should be generated separately or as a merged label file.
- Depending on your selection:
- Separate labels generate individual shipment label emails.
- Merged labels generate a combined shipment label file.
- The system sends shipment labels to the configured sender email address.

Step 13: Download shipment labels
- If separate labels are enabled, shipment labels can be downloaded individually from the shipment table. If disabled, the merged label can be downloaded using the Shipment Label button next to the Upload File section.
- Use the available download actions to retrieve shipment labels.
Tips & Tricks
- Always use the provided templates for shipment uploads.
- Validate shipment dimensions, weight, and values before uploading files.
- Use accurate shipment descriptions to improve carrier transit time calculations.
- Ensure commercial invoice information is complete for international shipments.
- Use the minimum rate option to quickly select the lowest shipment prices.
- Review shipment rates carefully before confirming shipment bookings.
- Keep shipment references unique to simplify shipment tracking and reporting.
This guide is about the customer portal. No account yet? Create one for free.
Still stuck?
Our support team is here for you 24/7.